
How Quants Can Master Jupyter: Magics and VS Code Tips (Part 1)
There are plenty of Jupyter tips online. But I promise this one will genuinely level you up — with quite a few tricks you probably haven't seen.
- Displaying multiple object values
- Magics:
%precision%psource%lsmagic%quickref, and more - The Interactive Window in VS Code
1. Magic Commands
Almost everyone who has used Jupyter Notebook has noticed its magic feature. These are special instructions that apply to an entire cell or to a single line.
For example, we often wonder: is the pandas blade faster, or the NumPy sword sharper? In quant work, we often need to take a quantile of a dataset. NumPy has a percentile method, while quantile is its pandas cousin. Let's let the two sisters spar. A magic called timeit gets the job done.
But first, we need to make sure they are actually comparable.
import numpy as np
import pandas as pd
array = np.random.normal(size=1_000_000)
series = pd.Series(array)
print(np.percentile(array, 95))
series.quantile(0.95)Both outputs are identical, which confirms the two functions are indeed comparable.
In the example above, to display two values we called print for the first one and omitted it for the second. This works because a notebook automatically displays the value of the last expression in a cell. It would be even better if this applied to every line.
No need to rub the magic lamp — that feature already exists! Just set:
from IPython.core.interactiveshell import InteractiveShell
InteractiveShell.ast_node_interactivity = "all"Run the code above in its own cell, and from then on you can drop print:
import numpy as np
import pandas as pd
array = np.random.normal(size=1_000_000)
series = pd.Series(array)
# 这一行会输出一个浮点数
np.percentile(array, 95)
# 这一行也会输出一个浮点数
series.quantile(0.95)This will display the same number on two lines. That's the first magic trick of the day.
Now let's see who is faster at crunching through a million data points:
import numpy as np
import pandas as pd
array = np.random.normal(size=1_000_000)
series = pd.Series(array)
%timeit np.percentile(array, 95)
%timeit series.quantile(0.95)We use %timeit to measure runtime. The output is:
26.7 ms ± 5.67 ms per loop (mean ± std. dev. of 7 runs, 10 loops each)
21.6 ms ± 837 µs per loop (mean ± std. dev. of 7 runs, 10 loops each)Looks like pandas is faster. And more stable, too — its standard deviation is only one-seventh of NumPy's. Quants know exactly what mean ± std means.
Here timeit is just one of Jupyter's magic functions. Another example: the quantile printed above has 16 decimal places — hard to read. Can we show just 3? There are many ways to do it, for example with f-string formatting:
f"{np.percentile(array, 95):.3f}"That's clunky — what happened to Pythonic? Try this magic instead:
%precision 3
np.percentile(array, 95)From then on, every floating-point output shows only 3 decimals. Nice, right?
If you are using a third-party library, find the docs unclear, and want to read the source, use the psource magic:
from omicron import tf
%psource tf.int2timeThis shows the source code of tf.int2time:
@classmethod
def int2time(cls, tm: int) -> datetime.datetime:
"""将整数表示的时间转换为`datetime`类型表示
examples:
>>> TimeFrame.int2time(202005011500)
datetime.datetime(2020, 5, 1, 15, 0)
Args:
tm: time in YYYYMMDDHHmm format
Returns:
转换后的时间
"""
s = str(tm)
# its 8 times faster than arrow.get()
return datetime.datetime(
int(s[:4]), int(s[4:6]), int(s[6:8]), int(s[8:10]), int(s[10:12])
)The Zillionare-omicron code is actually well documented. Quant libraries that include runnable examples in the code like NumPy does, with examples that pass doctest, should be rare.
There are so many Jupyter magics that you can't remember them all. Luckily, two magics can help. One is %lsmagic:
%lsmagicThis displays:
Indeed, there are way too many magics! Many of them, though, are just wrappers around operating-system commands. Another magic of a similar nature is %quickref, whose output looks roughly like this:
IPython -- An enhanced Interactive Python - Quick Reference Card
================================================================
obj?, obj?? : Get help, or more help for object (also works as
?obj, ??obj).
?foo.*abc* : List names in 'foo' containing 'abc' in them.
%magic : Information about IPython's 'magic' % functions.
Magic functions are prefixed by % or %%, and typically take their arguments
without parentheses, quotes or even commas for convenience. Line magics take a
single % and cell magics are prefixed with two %%.
Example magic function calls:
...The output runs to several hundred lines — not quick at all!
2. Using Jupyter in VS Code
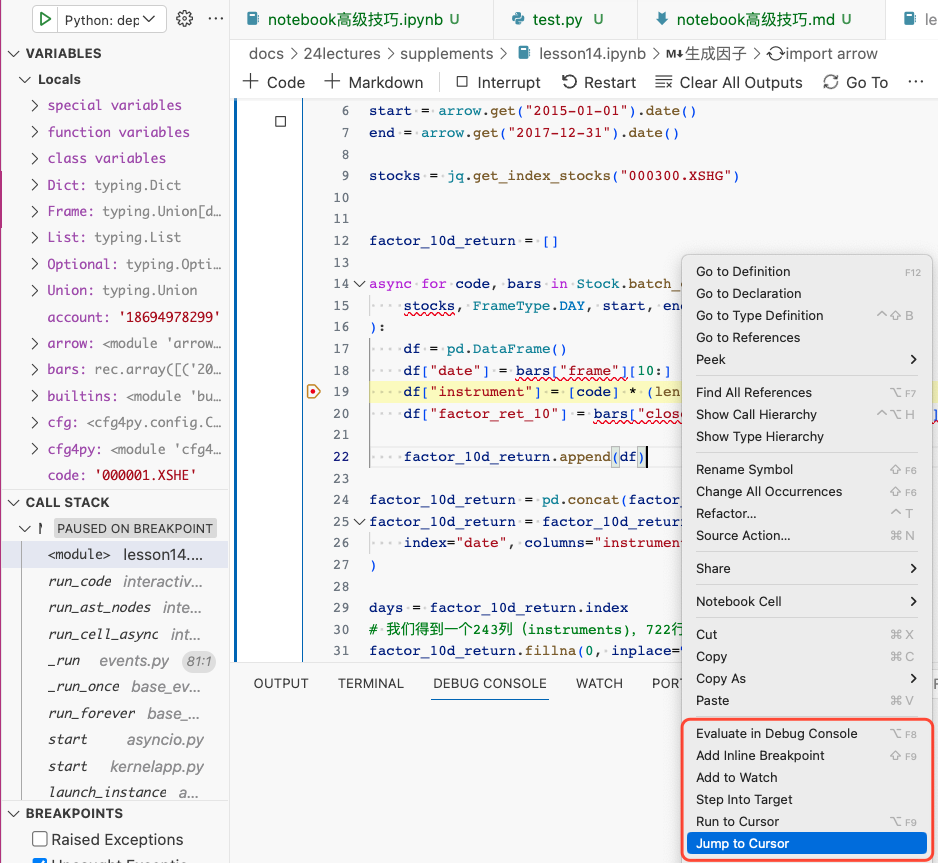
Whenever possible, we should do our Jupyter work in VS Code. Jupyter in VS Code may lag behind browser-based native Jupyter in UI layout — for example, spacing between cells is too generous, screen space isn't used efficiently, and there are fewer menu commands. But it still offers a few features that are hard to turn down.
First is autocompletion. Browser-based Jupyter uses a client-server architecture, so completions respond slowly and only appear after you hit Tab. In VS Code, completion feels exactly like native Python development.
Second, debugging notebooks in VS Code is much better. In native Jupyter you debug with magics like %pdb or %debug, but the experience can't match an IDE. The screenshot above shows debugging a notebook in VS Code — just as powerful as debugging a regular Python project.
Another thing native Jupyter can't do is navigate back to your last edit location.
Suppose you have a very long notebook where line 100 calls a function defined at line 10, and you discover a bug in that function. You jump to line 10 to fix it, then want to return to line 100 to keep editing — native Jupyter only lets you jump around with shortcuts.
Normally you can only insert markdown cells and use headings for quick navigation, but that still won't take you to an exact line. In an IDE, though, this is a must-have. When you edit a notebook in VS Code, you keep that capability.
Notebooks are great for exploration. But when it's time to move to production, you still have to convert them into Python files. VS Code provides an excellent notebook-to-Python conversion. Here is what the notebook version of this article looks like after conversion:
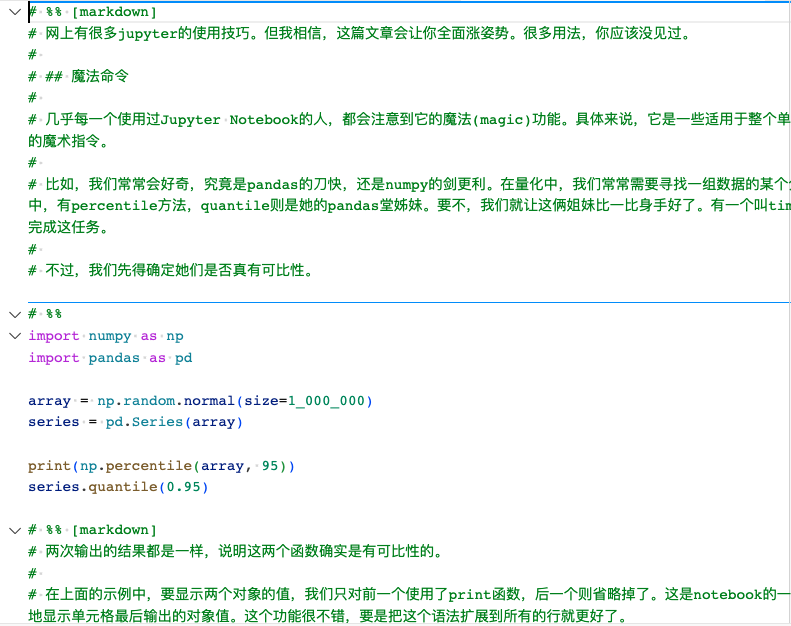
After conversion, the original markdown cells become comments starting with # %% [markdown], while native Python cells start with # %%.
The VS Code editor treats these markers as separators. Each separator starts a new cell that runs until the next separator. These cells are still executable. Due to my workspace settings, these toolbars are hidden, but they actually look like this.
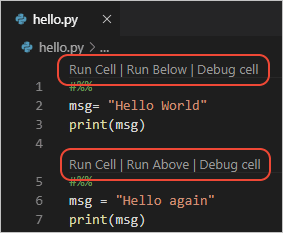
This feature is called the Python Interactive Window, as described in the VS Code docs vscode.
We convert the notebook into a Python file, but it can still run cell by cell like a notebook — like a Russian doll. The world's best IDE — VS Code lives up to the name.