
2024 Guide: Monetize Free Static Blogs with MkDocs
A few years ago, I recommended writing static blogs using Markdown. Static blogs have nearly zero hosting costs, making them ideal for personal blog startups. Markdown facilitates local search and can serve as a personal knowledge base.
Now, there are new developments. I have not only built a visually appealing personal website but also enhanced my GitHub profile and created a personal publishing system—enabling the export of articles as beautifully typeset images and PDFs.
The core of this solution is MkDocs and MkDocs-Material. The former is a Python-based technical documentation builder, and the latter is an adapted theme. I have introduced these technologies in depth in my book, Python Can Build Large Projects.
Based on these technologies, we can go further: not only can we write technical documentation, but we can also create blogs and portals.
The image below shows a screenshot of the website interface for Daifuweng Quant:
You can see its latest style on the Daifuweng Quant website. More creatively, although it is a static website, every time you refresh it, you see new content—at least the images change!
This is the homepage. The menu bar and search are standard configurations. The tag cloud and card-style layout on the homepage enhance the site's aesthetic quality.
All documentation has version control. I use GitHub to host documentation and images, so I also took the opportunity to beautify my GitHub personal profile:
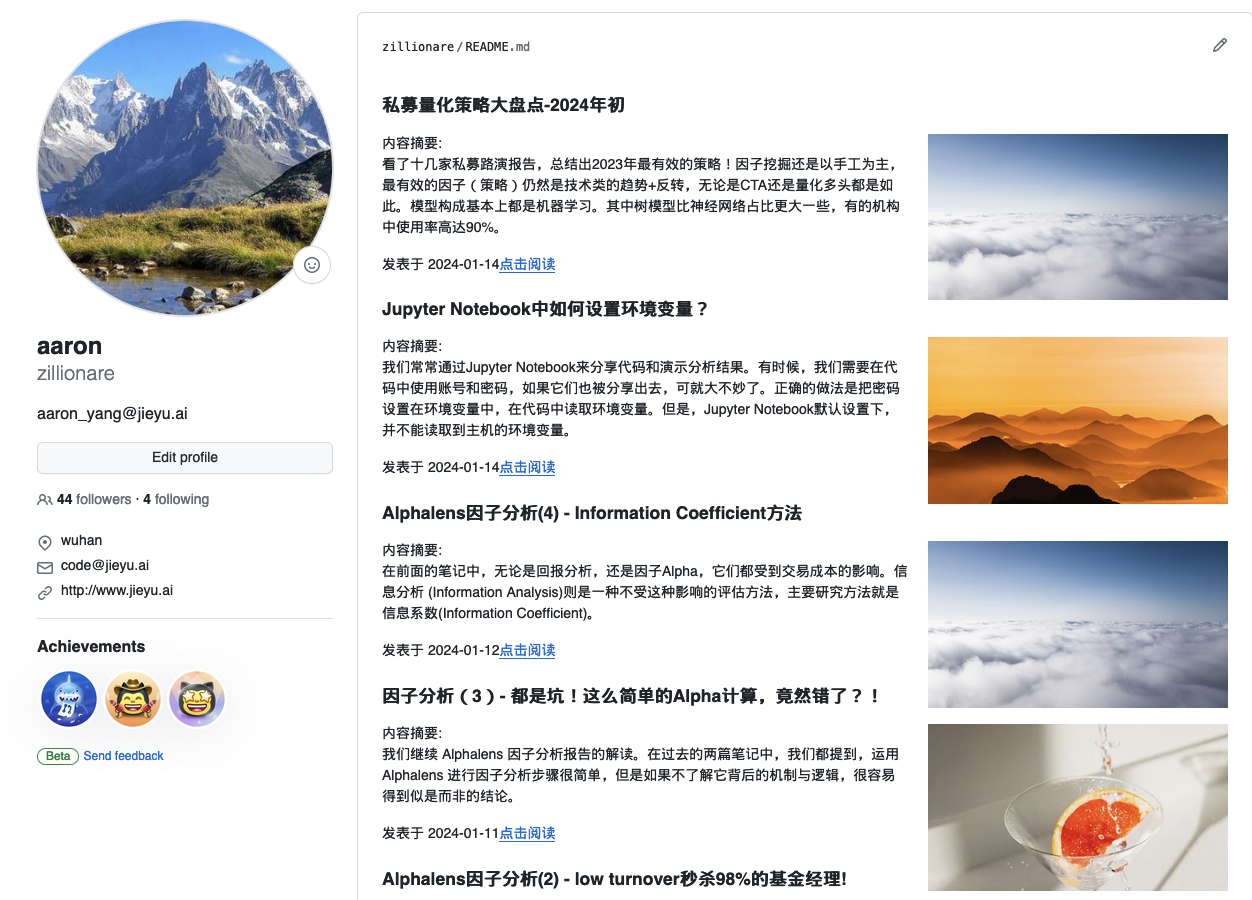
Honestly, I never imagined that a GitHub profile could look like a personal website. A good image certainly boosts the visual appeal.
Additionally, as a creator, I want my articles published across multiple channels, including WeChat Official Accounts, Zhihu, CSDN, and Xiaohongshu (Little Red Book). Sometimes, I need to export articles as PDFs. These channels use vastly different technologies with varying formatting requirements. To avoid wasting time on tedious, repetitive formatting, we must leverage various tools effectively.
MkDocs + MkDocs-Material
I have documented the basic setup in Chapter 10 of Python Can Build Large Projects. Here, we focus only on enabling the blog functionality and customizing the homepage.
Material comes with a blog plugin. We simply need to enable it (and other related plugins) in the configuration:
plugins:
- awesome-pages:
collapse_single_pages: true
- blog:
post_excerpt_separator: <!--more-->
- tags:
tags_file: tags.md
- rss:
match_path: "(blog|articles)/.*"
category:
- categories
- tags
date_from_meta:
as_creation: "date"
as_update: true
- rss:
match_path: "(blog|articles)/.*"
category:
- categories
- tags
date_from_meta:
as_creation: "date"
as_update: true
datetime_format: "%Y-%m-%d %H:%M"
default_timezone: Asia/Shanghai
use_git: falseThe rss plugin requires installing the mkdocs-rss-plugin. For customizing the tag cloud, please refer to this article on Code Inside Out.
That article also mentions how to implement the "latest posts" feature. However, the author ultimately decided to write a Python solution to achieve the effect mentioned at the beginning of this article—dynamic, card-style content that automatically updates the GitHub profile.
Custom Scripts for Card-Style Homepage and GitHub Profile
This solution primarily uses the python-frontmatter library. A script searches for all .md files in the articles and blog directories, reads their front matter, sorts them by date, and extracts the most recently published articles and blog summaries, dates, titles, and cover images. It then generates a new README.md file via a template, placing it in the project root.
GitHub reads this file as our profile, and MkDocs-Material generates the website homepage based on this file.
This readme.md is essentially an MD snippet with partial HTML tags. I first use a script to generate the README.md for MkDocs. After the website is published, I generate the readme.md for the GitHub profile. The main difference is that the GitHub profile cannot use <style> tags to define styles; it only allows a small amount of style syntax within HTML tags in the README.md.
tip
If you are interested in the details of this solution, you can directly visit the [zillionare](https://github.com/zillionare) project. Customization of MkDocs-Material is in the `docs/overrides` directory. The script for building `Readme.md` is in the root directory, named `publish.py`.In the publish.py script, I used frontmatter to extract metadata from articles, but it is somewhat slow. However, this is a good scenario for accelerating with multiprocessing:
metas = []
articles = glob.glob("./docs/articles/**/*.md", recursive=True)
with ProcessPoolExecutor() as executor:
results = executor.map(extract_article_meta, articles)
metas.extend([meta for meta in results if meta is not None])This allows for multi-process file processing. The final results are aggregated into the metas array.
Tip for Auto-Refreshing Images
Auto-refreshing images can add dynamic content to a static website, giving readers a different experience every time they visit. This is achieved via the gallery feature of the Unsplash website. Unsplash is a free image resource sharing site providing numerous high-definition, high-quality free images. If we point the `img` element's URL to an address like `https://source.unsplash.com/random/360x200?{word}`, Unsplash will return a 360x200 image categorized by `word`.Xiaohongshu posts cannot exceed 1,000 characters and are difficult to format. To share text, code, and mixed content, the only method is to convert them into images. This step is somewhat tedious, but it creates a barrier to entry, leading to a scarcity of in-depth content on Xiaohongshu. Therefore, mastering formatting allows us to effectively leverage Xiaohongshu's distribution.
My solution uses Slidev. It is a solution for creating online presentations based on Markdown syntax, providing functionality to convert to images.
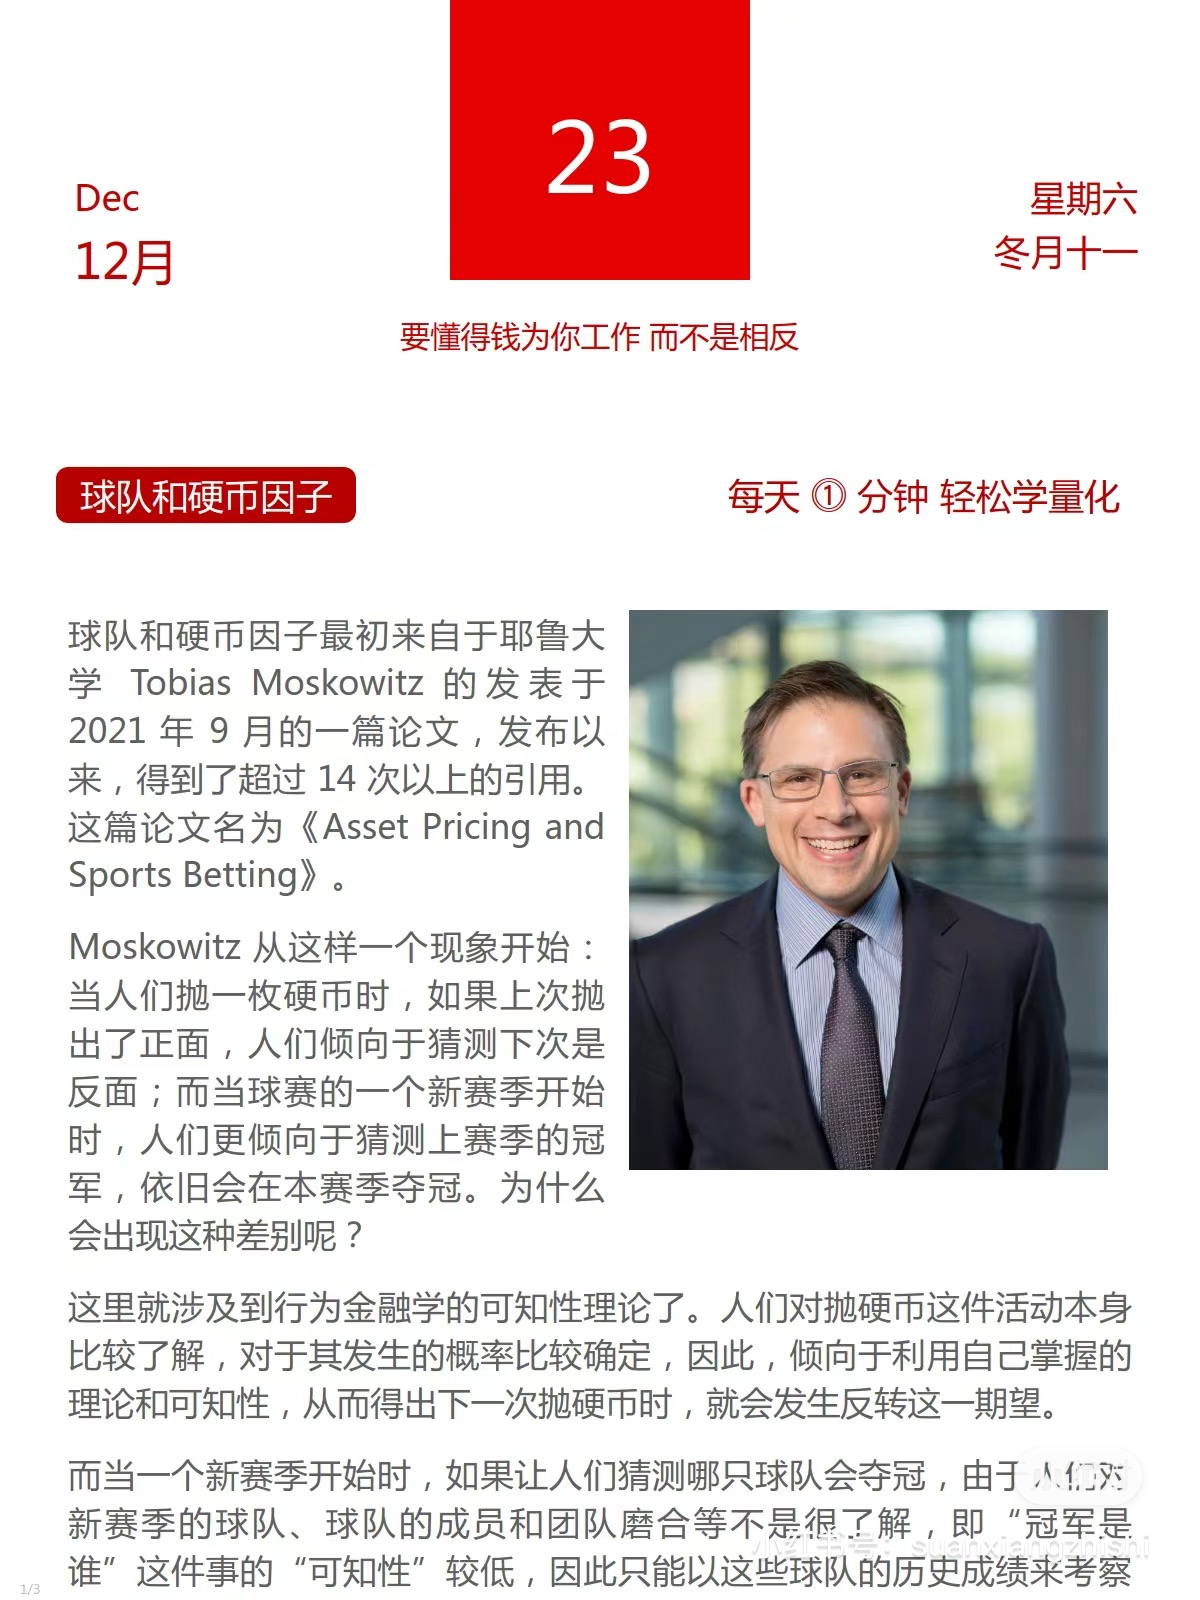
Therefore, documents created with MkDocs+Material can be easily converted into images with minimal markup and customization.
To implement this, after installing Slidev, customize the theme first. The most important part is customizing the cover layout. The image on the right is a homepage style I previously designed for daily Xiaohongshu updates.
We can design multiple styles and use the following command for export:
npx slidev export --format png -t /path/to/slidev_themes/special_theme_dir --output /tmp/xhs /path/to/src.mdWe need to add --- as page separators in the Markdown content at appropriate positions. This allows us to export pages as images suitable for publishing on Xiaohongshu.
Publishing to WeChat Official Accounts
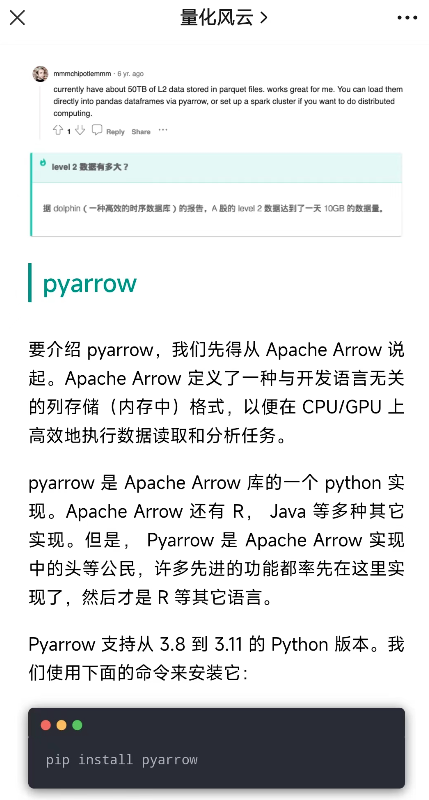
WeChat Official Account formatting has always been a problem. I even gave up creating content for it. As a tech geek, I rejected almost any formatting solution not based on Markdown. What era is this? Writing for self-media is already unprofitable, and platforms still dare to ask us to format specifically for them?
Until I met mdnice.
It typesets even better than my own use of MkDocs-Material—especially its handling of code. I absolutely love its 50 shadow effects in the dark theme!
I now love writing for WeChat Official Accounts! However, it would be better if mdnice could implement Markdown's admonition syntax. After all, this is an era of information overload. We must use whitespace to alleviate information density anxiety and use dazzling decorations to attract readers and prevent them from leaving.
Of course, mdnice can also publish directly to CSDN. However, this would lose the ability to schedule posts, customize tags, select columns, and customize cover images. Therefore, I prefer logging into the CSDN website to edit. Fortunately, it provides a Markdown editor that automatically handles image links. Thus, I do not need to upload images locally one by one, saving me considerable time.
Publishing to Zhihu
If you use VS Code to edit Markdown, you can use an extension called "Zhihu On VSCode." It supports scheduled publishing (within one day) and selecting columns, but does not support adding topics. Additionally, it does not correctly handle (remove) front matter.
However, it handles Markdown image links well, saving me the time of uploading images. It also handles code well.
However, Zhihu's document format is indeed too plain.
Converting to PDF
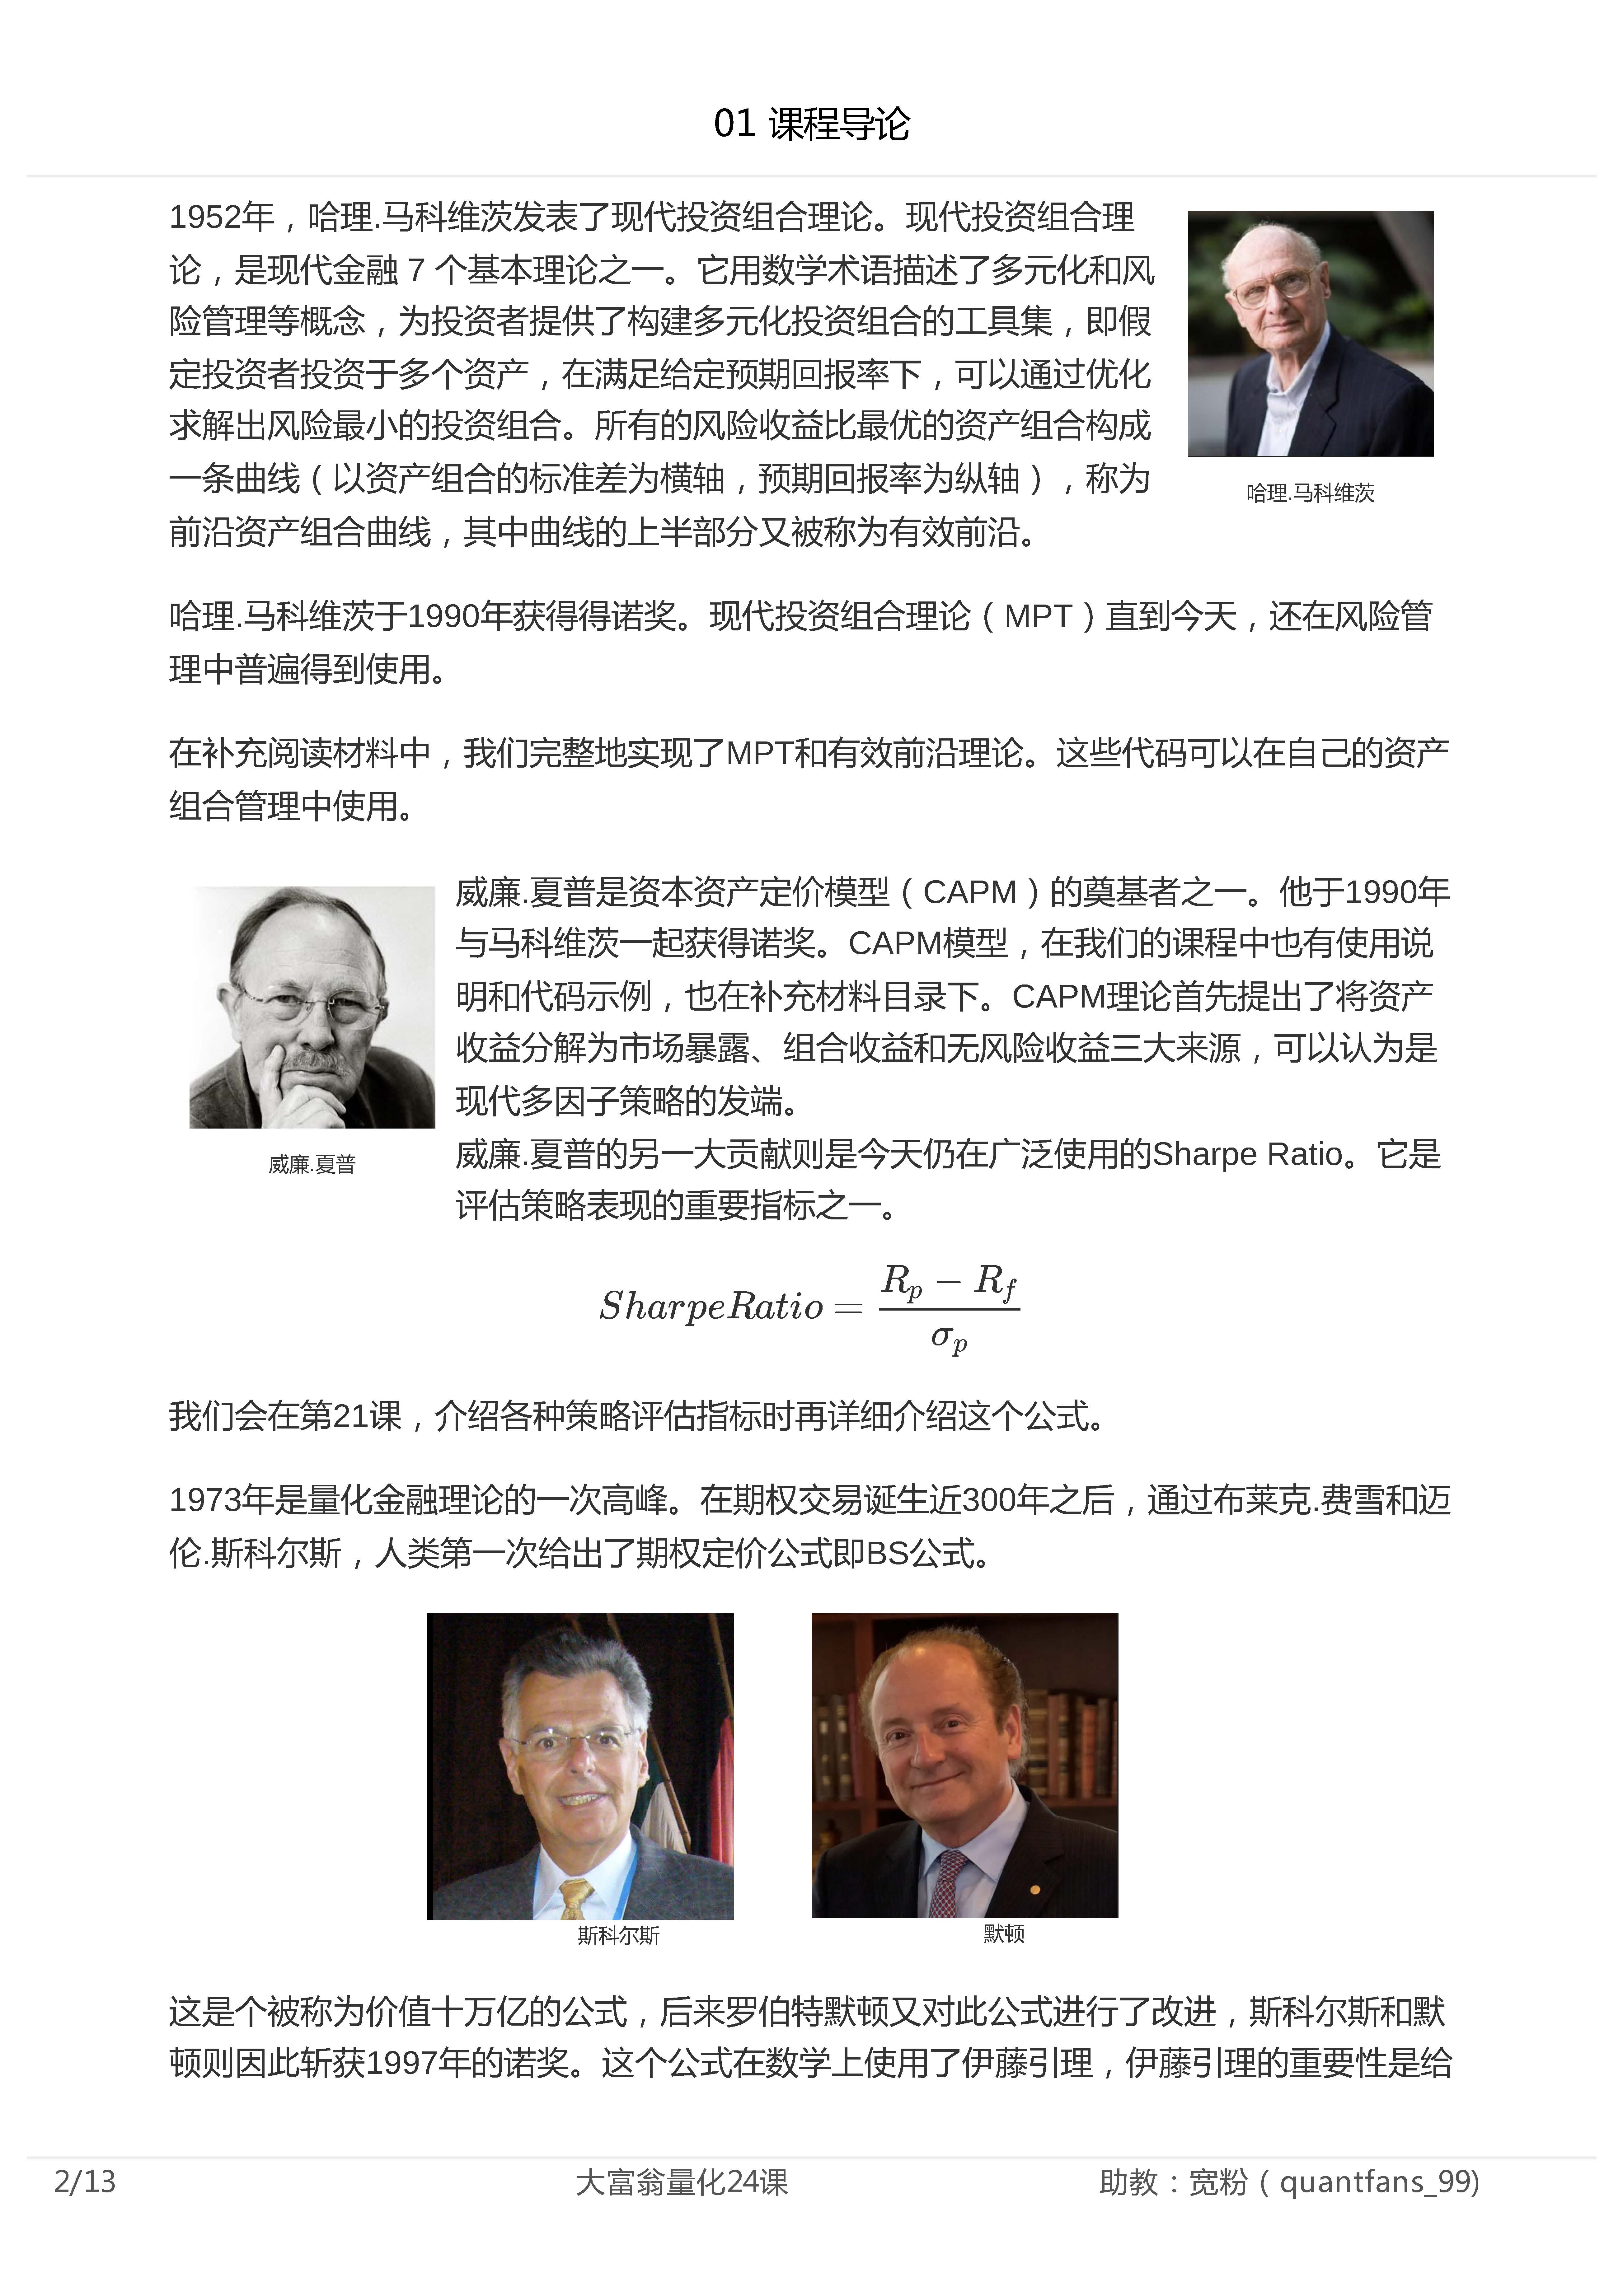
Slidev can also be converted to PDF. However, I prefer using VS Code's Markdown Preview Enhanced to convert to PDF. The final conversion is provided by Chrome + Puppeteer. By adding appropriate markers in the document's front matter, headers and footers can be generated.
The image on the right is an example exported by this method.
Additionally, Slidev can export PDFs. To implement headers and footers, you need to customize global-top and global-bottom. Once customized, this solution seems better, as it involves manual pagination, giving us stronger control over the pages.
Earning Some Money
Writing blogs is hard work; let's try to earn some money. We can use the overrides scheme mentioned earlier to have MkDocs-Material insert a JavaScript script into each page.
If you join an ad network, they will generally provide you with a JS script; just insert this JS. Alternatively, you can write your own JS, place the ads you want to publish as HTML snippets in a subdirectory under the docs directory, and insert these snippets using the following code:
function insertAd(minParas, minWords){
var links = document.querySelectorAll("a[href*='" + link + "']");
if (links.length > 0){
console.log("Added")
return
}
var paras = document.querySelectorAll("article p");
var wordCount = 0
var paraCount = 0
var inserted = 0
for (var i = 0; i < paras.length; i++){
var p = paras[i];
paraCount ++
wordCount += p.innerText.length
if (inserted >= 2){
break
}
if (paraCount >= minParas && wordCount >= minWords) {
console.log("find para", p, paraCount, wordCount)
p.insertAdjacentHTML("afterend", ad)
paraCount = 0
wordCount = 0
inserted += 1
}
}
if (inserted == 0 & paras.length >= 5){
var article = document.getElementsByTagName("article")[0]
article.insertAdjacentHTML("beforeend", ad)
}
}
document$.subscribe(function() {
console.log("call in ad")
insertAd(40, 4000)
})This code implements insertion within the text and at the end of the article. Ads are only inserted when the article content is sufficiently long. Similarly, the complete code can be found under the zillionare project, specifically at docs/overrides/javascripts/course.js. Note: Do not use catchy names like ad.js, as they will be intercepted by browser extensions like AdBlock!